Wednesday, 29 February 2012

Challenge of Music

Thank you for stopping by!

Today is the day, time to reveal what we've made for Erin's Challenge of Music. I can't begin to tell you the problems I've had getting this done these last few days (on top of having been in a bit of a rut lately, creatively and otherwise), but at last I've got something to show.

It took a long time to choose which song to work with. Should I go with the 80's music I grew up with on the radio? The early 90's music I've partially forgotten until they pop up on VH1? The songs from school that I've sung hundreds of times and mark the excitement of summer break or longing for christmas break? Or some of the bands and singers I listen to now, perhaps choosing someone I don't think that many (at least outside Scandinavia) knows of?

In the end, I settled for another type of nostalgia as my sis and I one evening (once more) searched YouTube for intros to all the tv shows we remembered from childhood. After looking trough a dozen or so videos we stumbled upon the serene intro and outro to Skymningssagor, "Twilight fairy tales". Skymningssagor was a children's television series that aired October 1988 through March 1990.


Intro

Outro


I wanted to capture the atmosphere; the simple melody, the lightness, the colours of dusk, the serenity. At first I was working on a totally different idea, but it had to be scrapped yesterday when I couldn't find a good way to finish the design. Frustration. What to do? So little time, so little materials that seemed to work with the images that popped into my mind. Went through half my stash and in the end settled for some thin (7 mm wide) silk ribbons in periwinkle blue and a variegated rose-purple. But what more? Some ideas had to be scrapped due to the fast approaching deadline. After a while I instead started to focus on a focal.


I found a matte transparent violet plastic flower button (38 mm) and looking for something to layer it with found a pink MOP flower button that I had sprayed with a matte lacquer. Finally something that could work as an eye-catcher! I like how the mother-of-pearl gives a subtle glow to the plastic (a bit like the Polaris Polsweet beads I showed a week or two ago). A brooch back was attached to the layered flower so it can be used as both a pendant and a brooch.


For this image I added the silk ribbons to turn the brooch into a necklace. Don't know how the pic looks -- it was tricky trying to get the right colours in both the flower and silk in the photo... Not too happy with the look right now so it'll have to be altered a bit later.I'm also thinking of adding some seed beads to the centre of the flower, a nice detail that I totally forgot in my haste to finish in time. Hopefully it doesn't look too bad though.

And so... That's it, my contribution to the Challenge of Music and my -- somewhat sidetracked -- interpretation of a song that brings back memories of childhood, children's books and beadtime stories to me. I hope you like it and be sure to visit all the other participants too -- of cause including the fab hostess, Erin of TresoriTrovati.

  1. Erin Prais-Hintz (hostess)
  2. Marcie Abney
  3. Christine Altmiller
  4. Elisabeth Auld
  5. LJ B
  6. Lori Bowring Michaud
  7. Shannon Chomanczuk
  8. Cece Cormier
  9. Jenny Davies-Reazor
  10. Malin de Koning
  11. Beth Emery
  12. Michelle Escano-Caballero
  13. Erin Fickert-Rowland
  14. Therese Frank
  15. Amy Freeland
  16. Tanya Goodwin
  17. Stephani Gorman
  18. Amy Grass
  19. Beth Hemmila
  20. Kristina Johansson (YOU ARE HERE)
  21. Jennifer Justman
  22. Tari Kahrs
  23. Susan Kennedy
  24. Ema Kilroy
  25. Kathleen Lange Klik
  26. Kirsi Luostarinen
  27. Paige Maxim
  28. Beth McCord
  29. Natalie McKenna
  30. Alice Peterson
  31. Cat Pruitt
  32. Bobbie Rafferty
  33. Johanna Rhodes
  34. Cynthia Riggs
  35. Sally Russick
  36. Sarah Sequins
  37. Amy Severino
  38. Staci Smith
  39. Kristen Stevens
  40. Lola Surwillo
  41. Stefanie Teufel
  42. Sandi Volpe
  43. Holly Westfall
  44. Shaiha Williams
~*~

Tuesday, 28 February 2012

Peanut oil patina


I'm editing photos for the Challenge of Music reveal, but thought I'd just show a couple of other pics while I'm at it.

Some time ago I heard about peanut oil patina and researched it a bit. Liked what I saw in the photos I found and in the end I decided to try it out. Now, finding peanut oil turned out to be a little tricky and none of the text found talked about any other oil. In the end I did find the right oil, but then after buying it other things got in the way so the bottle just sat there by the worktable for weeks and months. This weekend I tought it'd be a good subject for my other blog so I had to give it a try.

First piece, the copper blank on the right in the photo above got a bit too dark. Did know all instructions said to heat the metal slowly and stop when the right colour was reached, but I just had to add a little more heat. And a little more. And in the end it turned out very dark. But still nice and shiny so it isn't ruined.

For the second piece, a bronze tag, I didn't torch the oil as much and it turned out a nice dark golden colour. The unflattering light spots are water drops. There were some water on the pin I used to suspend the tag while torching and it spattered when heated by the torch, I guess.


I then had to ask myself if it was possible to use other, more common, oils and took some rapeseed oil from the fridge and also found some castor oil leftovers from the time me and my sis dabbled in making DIY make-up and cosmetics.

Now, at this point I should've read this list because while the rapeseed worked pretty much as well as the peanut oil, I set fire to the castor oil. The others just smoked. This one was suddenly engulfed in flames. Ooops... If nothing else, I should've known enough about cooking to consider the smoking point! But in the end, that bronze tag too got a nice patina.

The rapeseed oil tag looks better IRL, really. Also keep in mind that not only are these the result of my first try at the technique, I was too lazy to clean any of the tags befor torching them so with better preparation and careful torching the result would probably be even nicer.


Top row: plain bronze, peanut oil
Bottom row: rapeseed oil, castor oil

February weather


It wasn't a good thing, starting to talk about flowers and spring because yesterday we got snow. Enough to cover the ground, but it was gone by this morning. There's still some winter left, though I still hope we'll get an early spring. Or at least a less grey and rainy spring/winter.

These two photos were taken yesterday while it still snowed. It pretty much snowed all afternoon.


Took a quick snapshot of the view outside the computer room window just a few moments ago too (taken through the glass pane). All the snow gone. Though I wish the rain clouds would disappear too. I rather have cold, sunny weather than warmer spring temperatures and nothing but rain. Still, at least it isn't windy any more.

Monday, 27 February 2012

Recipe: Ginger florentines


Last Friday I baked some ginger florentines, also known as lace cookies, (ingefäraflarn) to cheer myself up. (That and a kladdkaka, of cause -- you always need a dose of chocolate.) So I thought why not share this simple recipe witih you? This kind of florentines is so easy to make and I just love the taste of ginger.

I eat them as they are. Others prefer to have them with ice cream or other desserts.


Ingredients (approx. 25 pcs)

75 gram butter
1 dl sugar
1 dl oats
1 dl wheat flour
1/4 teaspoon baking powder
1 teaspoon ground ginger
1 teaspoon vanilla sugar (optional)
1½ tablespoon milk
1½ tablespoon golden syrup


1. Melt the butter in a saucepan. Remove from the heat.

2. Stir in the other ingredients. Keep stirring until the batter is evenly mixed.

3. On a prepared baking sheet, drop (heaped) teaspoon fulls of batter and be sure to leave a generous amount of free space around each dollop. The cookies will spread out a lot during baking so they need the room. For the same reason, don't be tempted to use a tablespoon for the portioning (unless it's only half full).

4. Bake at 200° C (392° F) for 5 minutes or until they get a nice golden colour. (I prefer mine slightly underbakes so they are chewy in the middle with crispy edges, but that's just me.)

5. Remove the pan from the oven and let cool a bit before transferring the florentines to a baking table too cool. For fancier cookies, let the florentines cool on a dowel or draped over a small cup (to make baskets, ideal for fancy ice cream desserts).

6. Store cool and dry in an air tight container. Moisture will make the florentines soft.


Tip: If you haven't had you daily dosis of chocolate you can melt some dark chocolate and drizzle on top of the florentines. Or dip them in it. Or brush it onto the undersides.You can also put them together, two and two with chocolate in the middle.

Sunday, 26 February 2012

First crocus


 Triple posts today, but I just had to show the first crocus of the year. It's been just one degree outside (before sunset, right now it's probably dropped below zero again), but the sun and the budding crocuses still made it feel like spring.

TAST week 8: Chain stitch


English name: Chain stitch
Swedish name: Kedjestygn, kedjesöm

As mentioned in the previous posts I have some issues with chain stitch, often pulling the stitches too hard. Sometimes I prefer tambour stitch instead as it's at least faster. Inspired by Jane Davis' book I wanted to do some beaded stitches as the beads help me with the spacing and tension. That is also the reason I used aida. Let's just say it's been a week where I didn't want the embroidery stitches to add to my frustration.

My focus was on basic chain stitch and variations of it. No fancy variations or anything like that, but really what you can make with this relatively simple stitch "everyone" learned in school.

First my Aurica sample. It took some trial and error to get the right spacing this time. The open chain stitch in the middle was kind of a flop, but I liked the last chain stitches (bottom right). The top row could probably be useful in certain designs too.


For my first variations I played with alternating long and short stitches (bottom row) and making zig-zag rows. The second row from the bottom has a second, off-set, row of stitches on top of the first. The top right row (below the 2-loop stitches) is a row of stitches interlaced with the first row beneath it.


I then proceeded with some beaded variations, using 2-6 beads per loop/stitch. Viewed from the top, the first three variations have beads on both sides of each stitch. The remaining variations only have beads on one side, either on the same side (bottom right) or alternating (middle right and bottom left). The left side of the top row is whipped beaded chain stitch -- the only whipped variation I did this week. For the last row I experimented with two colours, wanting to get a striped pattern.


Lastly, I used the chain stitch to couch a short section of ball chain -- inspired by the couching I showed in this post. Gave up halfway through before realising that unlike my latest attempt couching this chain, it would be much easier if I tacked both ends of it to the fabric first. So if you see a break in the middle that's why.


PS! I just remembered I forgot to add a couple of pics of the chain stitches I tried last autumn. Will be adding them here soon. -- And here they are below, finally!


---
What is TAST?

Take a Stitch Tuesday is a weekly embroidery challenge throughout the year by Sharon of Pin Tangle. You can read more about it here (or by clicking the TAST badge to the right).


To see what others have done in this stitch, check out the comments in this post on Pin Tangle. Be sure not to miss Sharon's lovely stitch variations in the actual post.

TAST week 7: Detached chain stitch


English name: detached chain stitch, lazy daisy, daisy stitch
Swedish name: öglestygn, enstaka kedjestygn, bellisstygn

Today there'll be double TAST posts as I didn't post in week 7.

Chain stitch, detached and "regular", is a stitch I've tried before and which I'm not all that fond of. I do like it, it's really not that I hate it or anything, but it comes with a big but. I really like the look of detached chain stitch and admire lots of embroideries made by others using this stitch. But I don't use it that often myself and the main reason probably is that I keep pulling the stitches too hard, making them lose that pretty petal-shaped curve. It's the same reason I only crochet once in a while and don't like writing too much by hand. I pull, push and press too hard. Maybe I'll learn some day.

For the "doodle page" above I did a few rather basic variations. My aim was to make something other than flowers, which the stitch so often is used for. There's a butterfly and a dragonfly for instance. But in the end I had to do a few flowers too. It really is hard to tell, but the long-stemmed tulip have anundsjö stitch leaves. Wanted to try that stitch and doubt it will appear in the TAST challenge.

I also incorporated some buttons -- and learned that it's easier to add chain stitches if you stitch the button to the foundation first (like in the white button) rather than try to do nice, even and "open" stitches with the button moving around like the red one did. I also stitched one button with "reverse engineered" fly stitches (grey, left corner).


This is the result of my Aurica sampler. I've tried different lengths etc for different effects. Just playing with the yarn, seeing what I could come up with. I am planning on taking what I learn from these doodles and make e.g. a flower, dragonfly  or something. I was focusing on making petals here, but when I showed the pic on Flickr (and later here on the blog in the Aurica sampler part 1 post) I got comments from people seeing all sorts of things in my embroidery doodles. Fun!


Here are a few detached chain stitches with beads that I stitched on the bracelet made for Erin's Challenge of Color. I stitched the beads first and then added the daisy stitches around them.

---
What is TAST?

Take a Stitch Tuesday is a weekly embroidery challenge throughout the year by Sharon of Pin Tangle. You can read more about it here (or by clicking the TAST badge to the right).


To see what others have done in this stitch, check out the comments in this post on Pin Tangle. Be sure not to miss Sharon's lovely stitch variations in the actual post.

Friday, 24 February 2012

Snowdrops


I spotted some snowdrops in our garden today. Most of them are still just buds, but a few have started to bloom.

If you've followed my blog for sometimes you know it's almost a tradition by now that I take pics of the first snowdrops and blog about them. You can find the 2011 snowdrop post here (better pics than this year) and the 2010 post here. Photos from 2009 was published here. The camera batteries were almost dead so there aren't that many photos to share today.


These photos above are from the garden facing the road. There are some snowdrops behind the barn too, but there's much more snow and ice left and the plants are in the shadow in a different way so they haven't begun blooming yet.


We've got some winter aconites too. This particular patch of aconites started to bud before the snow came and now that it's melted away they can finally begin to bloom.


The weather report said spring would come to Skåne today. Not sure if I agree because while it's several degrees above zero, the strong winds makes it feel colder than when the snow came. But I guess the windy weather today and yesterday are signs of spring approaching too, just like the flowers above. No spring without a spring storm -- and the good thing is that the winds clear the sky from those grey rain clouds that's been parked over the farm for days and weeks (weeks ago they were snow clouds, now it's warmer so they turned into less appreciated rain clouds).

Thursday, 23 February 2012

Twisting it


The creative frustration mentioned in the previous post has also meant I've spent some time pondering over bits and pieces in yarn bags, ribbon hampers, bead boxes etc. One thing I often do when wanting to see how two strands of beads, three yarns or four cords and wires look together is to twist them. Loose or hard, but often both, observing the different looks I get. Here are three examples of that.

[If the pics looks a bit strange it's because I'm practising my Pixlr Editor skills and because I didn't use my usual set-up with the construction light but used another lamp with less brightness but with a light that gave some really harsh shadows. And I didn't denoise the pics in Neat Image first as I usually do. Still have a bit to learn about the software, trying to find all the right settings and functions and coping with some of my fave functions not being available in this programme. Could've used Picnik as it's not yet closed, but I must learn sometime, don't I...]

Above is a twist made with one strand of space-dyed viscose gimp and one strand of space-dyed viscose bouclé yarn (same yarn as I used in this necklace chain) twisted and folded in half. At first I wanted just one strand of each in the finished cord, but it was easier to twist the two strands together like this. I like gimp and the look of the rayon bouclé so why not combine the two?


Then I twisted some 7 mm bias cut silk ribbon. I tried twisting to colours together, but it ended up with one cord more of less completely enveloping the other. Here, I used only one ribbon (in a colour that looks much prettier IRL!). And I must say the twist itself also looks much nicer IRL than in this pic. Anyway, this is something I'll think about using in a future design. Though I don't recommend just twisting these ribbons if you don't intent to use the twisted cord as the edges will fray when you do this.


The last twist is actually one I made when doing my cretan stitches. Liking the look of my triple cretan border, I twisted the rest of the three "bamboo silk" threads together.

Doing these twists I also remembered why I don't do that many twisted cords and bead strands in my jewellery: they can be tricky to get firm enough, you drop the thread and the whole thing unwinds before you're finished, the twists easily gets uneven. Etc etc. But the basic technique is so simple you just have to ignore the problems sometimes. And sometimes a round braid (e.g. kumihimo braids) just don't give you the right look

And it reminds me I still haven't tried twisting wire and floss/thread/yarn together. Like twisting wire as it doesn't unravel on its own and you can lose the grip without the whole thing unwinding. So mixing the two materials might be fun, getting the firmness of the wire and the softness of the yarn. (Wire and floss twisted together is used in ganutell, often called "prepared thread".)


PS! Talking about braids: tomorrow's post on my other blog will be about lucet braiding, making cords using a two-prong fork (includes links to an article on making your own lucets). Could be a less common alternative to cord making for anyone who likes kumihimo.

Deadlines and guilt-free blogging


I haven't blogged in a few days now. Main reason is probably that I've spent my blogging time working with my other blog and the time not spent in front of the computer reading blogs, searching for jobs, looking for things to blog about (on my other blog) and so on, I've spent either thinking about my challenge designs or rereading War and Peace. Good book -- before I began reading those old russian "tomes" I'd heard so much about them being heavy, unbearably long, having too many characters, being so complex etc etc, but really it isn't tough to read and the stories are interesting. Though, on the other had I read a lot of epic fantasy as a teenager so I guess I got used to complex plots, huge amounts of characters and really long books before tackling Tolstoj and Dostojevskij.

But I'm digressing. One reason I haven't blogged much is that I haven't had the time or energy to respond to comments or comment on blogs I follow and that leaves me feeling guilt. Pair that with guilt about not doing that TAST post I keep postponing yet (have postponed it til the weekend/Monday when doing this week's post) and the fact I'm slightly stressed about re-doing my challenge jewellery yet again and you get the picture. This blog is all about guilt-free blogging: I blog when I want and about what I want. It means being prolific sometimes and rarely writing at all other times. Sometimes I give myself "good guilt", which is kind of deadlines I impose on myself in order to fight my tendency to procrastinate when not having any set dates to comply to. That is not a negative thing, that's all about pushing myself to do things I know I'll be pleased with once finished. Comments and being social, now those are the things that make me feel "bad guilt". Guilt about not thanking for comments, being nice in return, interact etc, but just pushing it ahead of me day after day because of lack of energy, disinterest, guilt for not focusing on my work instead of being online and so on. So by not blogging, I can eliminate some of that guilt.

But one of the things bothering me right now is not so much that but instead the frustration I feel trying to work with my challenge pieces. Before it was just worrying about time and meeting multiple deadlines withing a few weeks, especially considering I hadn't been that poductive lately. Now it's a purely creative frustration. I've made half a dozen beaded beads for my bead soup necklace and now I'm ready to give up that idea! Which was just "half an idea" to begin with, i.e. I had beads picked out and ideas for parts of the design, but no whole picture. And not having been able to merge the parts into a working whole, I have to abandon the idea -- at least for the time being -- and find a new approach. I just hope my new design won't be in need of the beads used in the beaded beads because I don't want to frog them now... They are simple but I really like them and don't want to rip them up. I'm working with supplies in my stash, can't buy anything new right now and that's part of the frustration as I imagine using beads in a gorgeous colour that would match this or that component perfectly, but I don't have it. Or, I have the colour but in the wrong size beads -- or there are too few of the beads. Or I have the beads but nothing to add in between them, making the parts into that elusive whole I'm chasing.

Good news is at least that I've found some beads and a colour palette I like for the Challenge of Music. And that of cause also means I've settled for a piece of music to work with. Yay! Now the design just needs a nice focal, fitting the theme and atmosphere of the music I chose. Wish me luck with that!

I've also thought about entering a little swedish seedbeading contest with deadline in between the bead soup party and the Suddenly Spring challenge. Would be fun as I haven't entered any contest in ages and have an idea for what I'd like to do (no design, but ideas about materials and techniques). But with the blog hopping and race against the clock finishing my challenge entries, I just don't feel like I have inspiration and time to come up with something good for that as well. So keeping my fingers crossed I'll have a surge of creativity and energy soon so I can realise my vague ideas (and have a chance to win some much wanted beads).


PS! The pic is from my bead table -- i.e. bedside table -- last night. I often bead in bed, days and night, and enjoy looking at my WIP:s and latest bead purchase before going to bed.

Saturday, 18 February 2012

Aurica sampler, part 1


A few weeks into the Take a Stitch Challenge, I got the idea to experiment a bit and stitch with some of my novelty yarn instead of just using embroidery floss. Of all the knitting yarns, I picked up a ball of Red Heart Aurica ribbon yarn. It turned out to be a lot of fun working with it in my needlework.

Here is the first "sampler" of the TAST stitches I've made with the yarn so far. Hopefully it might be of inspiration to others who enjoy needlework and wants to try something a little bit different. As usual you can click on the pics for a larger image.


Feather stitch


The sample that started it all. Loved the effect and decided I should try to do every stitch with this yarn.


Detached chain stitch


This week's stitch was detached chain or daisy stitch. I will make a proper TAST post on this stitch next week. Until then you'll have to make due with these experiments, mostly made thinking they could be used as petals for embroidered flowers or perhaps dragonfly wings.


Blanket stitch, Fly stitch & Herringbone stitch


For the herringbone I did both a single and double version of the stitch.


Cretan stitch


As with the herrinbone, I also tried a double version of this stitch.


Chevron stitch


With the chevron stitch, I only got this far, trying just one basic version.


Straight stitches


This isn't part of the TAST challenge and I don't think it will be either, being such a basic stitch. The long stitches are twisted, one harder than the other -- a silk ribbon embroidery technique I read about at Di van Niekerk's blog.


~*~ You can find all my TAST posts here. ~*~

Bead blog recap w. 6-7


It's been another two weeks so time for the biweekly summary of my writings on my other blog, Manekis Pärlblogg. Not that many posts this time, but hopefully still something of interest. Photo and pricing tips, new contests, leather and suede roses, twin bead project and inspirational ideas are some of the things you'll find in the list.

Friday, 17 February 2012

Pink as autumn colour


These are some photos I took last year when I, inspired -- or if you prefer, challenged -- by the Pantone Color of the Year 2011 ( Honeysuckle) and the photos I showed in Autumn in pink and chartreuse, thought about different ways of using pink in my beadwork.

I had used a special kind of pink, the lovely juicy padparadscha, with my favourite brown and olive green/kakhi autumn colours several times so it wasn't a novel idea to me, pink as part of an autumnal palette. But this time I tried a few other combos too, using varying pinks such as rose satin and indian pink instead of just padparadscha. Never got around to post the pics during autumn and them came winter and if felt too late. But now I'm dusting them off.


This post is related to my "Turquoise as an autumn colour" and "Lime and chartreuse as autumn colours" on my other blog. There I discussed these colours that you might not consider autumnal and how to use them in autumn-themed colour palettes.

Thursday, 16 February 2012

Twin beaded beads


Having scoured the web for twin bead projects (a post on that subject will be published on my other blog tomorrow), I had to finally get around to using my bag of  twin beads that I got weeks ago.

I felt like beginning withh some beaded beads. Forgot to print out Simone's lovely free project Twin BB so even though it was a project I wanted to do once getting the beads, I ended up with two other designs instead. The big beaded bead was inspired by a pretty design spotted on the blog Micaoldala. (That link is not just for crediting her with the initial idea, but also because I think you should check out her other lovely twin design in that blog post too.)

The design is similar in structure to "hana-ami beaded balls" -- like e.g. this one or this one -- but the 2-hole bead design mean you have to stitch it in slightly different way. Still, if you know how to make that kind of beaded beads, it shouldn't be too hard for you to figure out how to make this ball.


The smaller beaded bead was a pure experiment. I wanted to do something similar to these with five beads on each side. It didn't work as I couldn't "close" the beads in a ring on the back. So I added a third row of beads. If you look carefully you can see that it's not even: one side is flatter than the other. Makes it looks something like a small round cone (cone as in strobilus) or hops.

And that's what I've done with my twin beads so far. Not very much, but at least I can say I've tried them and don't have to feel bad about the unopened bag of beads anymore. Now I have to sketch on new ideas and add some more colours to the stash -- but it'll have to wait until I've finished the challenge entries (and possibly also a small contest entry).

Anyone else that've used the twin beads? I'd love to see some pics of what you've done with them.

Tuesday, 14 February 2012

Båstad and Laholmsbukten *image heavy*


I sort of promised to show some photos of Bjäre clad in snow yesterday, but without much advance warning by sis and I decided to tag along when mom drove to Båstad so I spent most of my time yesterday there. My sis had her camera with her, more or less by accident, but it turned out to be a fab thing. When we reached Italienska vägen, the road leading into the village of Båstad, we could as usual get a great view of most of the bay Laholmsbukten, the bay between the Bjäre peninsula and the province of Halland. Seeing ice covering it almost all the way out to Norrviken, we quickly decided that we just had to got down to the sea after running the bank errands that had originally prompted my sis to go.

So the good thing is I've got some new sceneries to show instead of the same old spots I always post about.  And maybe I should warn that this post might get picture heavy. As always you can click on the photos to enlarge them.


We went down to Brunnsparken, which really isn't much of a park: it's just a strip of grass and some trees separating the shore from the houses and Strandpromenaden, the promenade stretching along the shoreline from east to west.

You can't see it in the photos, but our old school is just down by the promenade. Not many people have had the luxury of having a "seafront school" and indeed today no school would be placed at such an attractive location. No, it'd be nothing but top class hotels and millionaires' villas. In art class we would every now and then be allowed to go down to the beach on a good day to draw swans, seascapes etc, sitting in the sand or on the old WW2 concrete bunkers (part of Per Albinlinjen) and enjoying the sunny weather. You can see the bunker in the pic below.


This is a view of the shoreline stretching towards Malen.


The ducks and gulls saw us straight away and swam/walked to use in a big, loud group. They were very disappointed when realising we hadn't got any food for them. No swans to be seen, though. (As for that last pic I don't know why, but when I uploaded it Blogger rotated it like that. Tried to do it again, but with the same result.  *argh*)


Turning our attention from the birds, I took some photos of the sea. The first photo is taken on the pier.


We then proceeded to the harbour and I took a photo of Båstad as seen from the pier. And one of the ridge, Hallandsåsen. As you can see, it more or less surrounds the village on all sides. Well, except for the seaside of cause...


We continued west, passing Hotell Skansen and the old cannons protecting us from the russian. Or at least they used to do that in the old days. These cannons were in fact used against the russian navy, who attacked the village in the summer of 1788. The bath house belongs to the hotel. This beach, Skansenbadet, is one of the most crowded in the summer, being next such popular places as Pepes Bodega and the centrecourt.


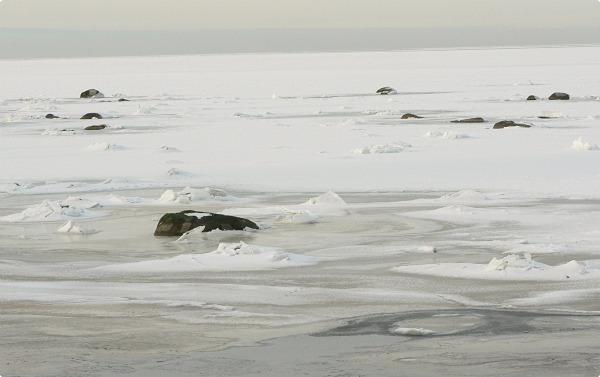
I know it sounds weird, me living on a small peninsula and all, but I haven't been down by the shore in wintertime for years so the frozen seascape really fascinated me. Sure I see (and take lots of pics of) the icy sea from a far, but I very rarely get this close.


We continued passed Lejontrappan with it's lion fountain -- a lion with a very wonky nose as it's fallen of several times and been patched together -- and the fancy villas. This part of the promenade was actually closed as they are still restoring the walkway after the damages done by the advent storm I wrote about here, but no one was working at the part we were on so we walked there anyway (as many others had also done).


Then we thought it was time to go back and decided to take another route through the village, following Lindallén and Aghardsgatan, instead of going the same way back again. These pics are from Aghardsgatan -- houses for the rich, just like the villas.


On the short end of one of the houses on above mentioned street you can find this cannon ball embedded in the wall. It is said to be a memory from the attempted russian invasion that day in August,1788. When I was a kid I thought it had lodged itself there when fired from the ship's cannons. A lot of kids have thought that. Nor is it conclusively proven to be a russian cannon ball at all, but a good tale is always a good tale.

And again Blogger has rotated the portrait format pics. Why, Blogger, why??

Well, Blogger's issues aside I hope you've enjoyed reading through this long post. And I hope you like the seascape as much as I did.
Related Posts Plugin for WordPress, Blogger...