Showing posts with label Rings n Things. Show all posts

Friday, 1 July 2011

Metallic butterfly wings


This little critter is an Arte Metal decorivet by Vintaj that I got as part of the delicious beady mail I got when winning the Rings & Things blog partner drawing this spring. If you want to see what it looked like before I altered it -- forgot to take a pic myself -- you can find a photo here.

Inspired by a keum-boo butterfly, I wanted to add a mottled effect to the wings using leaf metal flake. Leaf metal often comes in sheets, but flakes are -- as the name inplies -- a blend of different types/colours of leaf metal in small flakes. They are sold in different colour combination and here I choose to use one with purple and rose flakes on top of the gold, silver and copper ones. That is gold- and silver-coloured copper, not precious leaf metal.

Compared to working with sheets, it's very easy to "gild" a surface using flakes. For a mottled effect like this one you just simply dip the surface -- painted with size -- into the flakes, let it dry a little and brush of excess metal with a soft brush before letting it set completely. If you don't like the result, add size to points you like to cover with a different colour flakes and either dip again or apply single flakes to the spots using a soft, dampened brush.

The butterfly has tiny specks of leaf metal on the body. That's because I initially wanted to add foil to the bands across it, but didn't like the result so I scraped it off. You can't really see much of it IRL as the butterfly is smaller than in my photo, but I'll try and scrape some more off before sealing the gilding. Because it's copper-based, the leaf metal can easily tarnish unless coated.

Not my best work using leaf metal flakes, but a fun -- if slightly fiddly -- alternative to using paints, alcohol inks, gilder's paste and such.

Saturday, 18 June 2011

Sometimes you're lucky


Like I mentioned in the giveaway post earlier, I feel like I've won several giveaways and prize draws lately. It's always been my intention to do something to show off on the blog and thereby also send a little thank you to the generous people that've given these beads and components to me. But seeing how I've not blogged much lately, I haven't really gotten around to do that. Sure, I've mentioned a couple of the things on my other blog, but today I thought I'd at least show you some of the things I've got and who I got them from.


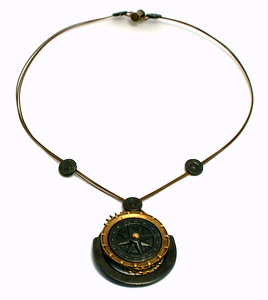
This first pendant -- without the bail I've added just to test an idea of mine -- is from Clay Designs by glee. I won it in a Beads of Clay open studio event. If you, like me, love ceramic beads, be sure to check out the Beads of Clay website and blog.


Recently -- ok, probably some months ago, but it feels recent -- I also got some lovely patinated bronze clay components and a polymer clay heart by Staci Louise Originals from her Artisan Accents jewellery components line (in a giveaway at Lorelei Eurto's blog). One of the bronze pieces are missing from the photo.


What more have I got? Yes, I won a monthly prize draw as a Rings & Things blog partner. (That was probably a few months back by now -- time flies!) This included sparkly Chines rondelles and a small swarm of butterflies.


I love the butterflies, but one thing I really liked was the colour in these little rondelles. It's called 2-tone green and it's a sort of light sage green finish on crystal, which glitters with hints of mauve and also a slight blue tint. And, boy, does these rondelles sparkle despite their small size (3 mm)!


Then, this week I got this loot by Beads Direct. Not a giveaway, but a prize I won in their "bloggers and writers competition". I was one of three winners with my blog post "Grey looks best with colour!". In line with the colour I chose, I got this handpicked mix of monochrome beads. I especially like the lentils. I'd probably never buy them myself as I don't use chunky lentils that often and would've focused on other beads, but having them here in my hand I just love them.

(Click on each pic to enlarge it: they don't look as dark then.)

*

There you have it, just some bragging. Sometimes it really pays off to enter giveaways and competitions, even when it feels like you never win. Because one day you will. I'm not luckier than anyone else and see what I got! It's just a matter of not giving up just because of the odds and of finding the opportunities.

One good way of finding these opportunities is of cause to follow blogs (as well as following people on Twitter and FB) and sign up for newsletters. In the newsletters, shops and magazines will announce upcoming and current contests they arrange. As for blogs, follow blogs where you know giveaways are common, but it also pays to follow other blogs as bloggers often gets extra chances to win if the blog, tweet or write something on Facebook about the giveaway they want to enter. Some bloggers -- like me, over at Manekis Pärlblogg, or Michelle Mach -- will also blog about contests, calls for submissions etc that we hear about.

If you're active on a forum, there might be a section where members can post tips about contests etc. If not, you might want to start one. You can also start a section or thread with giveaway tips. Help each other to find all the fun contests and giveaways/blog candy online.

Most of all, if you find a giveaway or competition, don't pass up just because you keep telling yourself you never win. Who knows, this time it might be your name they draw or your creation the judges will choose. Maybe you win, maybe you don't. You won't win most of the time, that's just the way it is, but hang in there and you will win one day. The only way you're definitely not going to win is if you pass up when the opportunity arises. And it's always the things we don't do, not the things we do, that we regret later. So take the chance whenever you can. Find the opportunities. Just do it!

Monday, 6 June 2011

Bead blog recap weeks 21-22


Almost forgot to do a recap this weekend. As I'm doing this on a Monday I might as well also mention that today's blog post on Manekis Pärlblogg is about a new beading contest, Native American Necklace Contest. Read all about it here (or rather, if you don't speak Swedish, find the link to the contest info there).


Beaded bead chain

Make a beaded chain with embellishments that looks like beaded beads. The technique is similar to spiral rope and bead wrapped beads in the way the beaded embellishments are made between stringed sections.

June monthly challenges
New design challenges from Art Bead Scene, La Bella Joya, Operation Tackle That Bead Stash and Vintaj.

Turn glass beads into cabochon
Using a kiln for glass fusing, you can slump glass beads into pretty cabs. No kiln? Use beads slip in half and grind down any sharp edges by hand, machine or using a tumbler.

Silver-filled
With the prices of silver soaring, silver-filled (AKA rolled silver) has become an option that can now be found in several US bead shops.

Vintage style butterfly beads
More butterfly beads -- the perfect motif for summer jewellery. This time pretty copper beads with retro images from Jewels by Jules, sold by Rings & Things. See photo above.

eMag for copper lovers
Copper Wire Jewelers is an e-publication from the team behind the community with the same name. The mag doesn't contain projects, but instead you'll find eye candy by jewellery makers from the community as well as useful articles.

Flex Your Creativity 2011
SoftFlex Company has announced this year's edition of their design contest Flex Your Creativity. The challenge this year is in mixing their beading wire with their new craft wire.

Personalized tags
I've had a couple of people ask me about logo tags recently and here's my reply. Includes options such as buying logo stamps, ordering ready-made tags (cast or engraved), doing your own engravings etc -- and the latest thing, engraved acrylic/plexiglass tags.

Caring for your jewellery
Jewellery care is important for your pieces to last long and look good. Also, cleaning jewellery is important for the maker in order for the jewellery to really sparkle when displayed and photographed.

Dyeing bone beads and components
How to dye components made of bone. Dyes that work on bone often work on other porous natural materials such as MOP, FW pearls, wood and more.

Colourful patterned components
Beads Direct has a new collection of coloured, patterned jewellery components (clasp, chain, jump rings, links) perfect for informal summer jewellery.

Customized ear cuffs
Ear cuffs are hot. Frost08 offers a service for those of you who want to order custom made ear cuffs rather than making them yourselves. Also includes link to tips on ear cuff projects for those of you who want to make your own cuffs from scratch.

EU to ban cadmium in jewellery
From december, the EU is banning all use of cadmium in jewellery and plastics.

Calla lilies
Make your own dimensional versions of this easily regonizable flower, using sheet metal, beads, clay and more.

Thursday, 2 June 2011

Celtic Braid Cuff


A couple of days ago, I got an e-mail saying my Celtic Braid Cuff didn't win anything in Rings & Things' contest, but it did get chosen as one of Polly's Picks ("non-winning designs that we think display a noteworthy use of Rings & Things components in a practical design"). Which does mean I've got some money to spend on beads this weekend.

The bracelet is a prime example of how a design can grow and evolve into something different than you originally planned. In this case, I knew I wanted to use braided cotton cord to embellish the leather cuff. But originally, I wanted to whip stitch the edges and make some sort of insertion stitch between the stitches along the edges. Not having a proper embroidery bible at home, I tried to google insertion stitches. As luck would have it, I for some reason couldn't remember the name for this type of stitches so I had google rather randomly until I ended up finding not the Swedish but the English name for them. And finding a good embroidery source in English, I suddenly found a stitch I'd never seen before:
Interlaced band (AKA german interlacing stitch, interlacing insertion stitch or interlaced faggot stitch when used in insertion/faggoting). That's one cool stitch to just stumble over!

This stitch combined two things I like, but rarely get around to do: braiding and hand embroidery. Finding this stitch I immediatly abandoned my original idea and began testing it on a piece of felt before moving on to the cuff.

While I liked the finished braid, it did feel slightly unfinished and angular. That might appeal to some, but I felt it needed a touch of something. So inspired at least partially by the Vikings and their habit of "encasing" writing on runestones using borders, I stitched the left over piece of brown cotton cord to the black cord along the edges of the stitched motif. The thread I used to stitch the cotton cord is not visible on the front nor back: it runs through the cord and, at intervals, it's stitched to the black cord where that cord exit the holes in the cuff.


There's a total of four cord ends that I secured on the back by tacking them to the cuff using the beading thread and treated the tips with an anti-fraying product. I wanted to avoid clumsy knots and criss-crossing cord on the back so it'd be comfortable to wear. You can't see the unobtrusive tacked cord ends in the pic below, but you can see what the double herringbone base looks like on the inside of the cuff: just two even rows of short stitches.

The holes were probably the toughest part of the creation. Lacking leather-craft tools, I used fine leather needles and two sizes of tapestry needles to make each hole. That took some time... To make sure the pattern of holes became even, I placed a piece of graph paper on the cuff as a template. Of cause, eventhough I tested the stitch before making the bracelet, I forgot one important thing: you need to make the herringbone base very loose as the braiding tightens the stitches. I did make it loose, but not loose enough. Simple didn't count on the thick cord taking up that much space. When testing it on the felt, the soft fabric gave way to the cord in a way the leather couldn't. I didn't realise that at the time. But at least I know it for my next celtic braid bracelet. Because I will make more. And I will buy some more cuffs so I can make that insertion stitch bracelet I originally planned too. (I probably should invest in some leather-working tools as well, but hey, I'm not made of money. Have to prioritize.)
I'm so glad I found this celtic-looking stitch and I will use it again. It's pretty easy to make and a lot of fun. You should try it too!

*

To see all the winning entries and the rest of the Polly's Picks in Your Designs Rock 2011, check out the contest gallery here.

Tuesday, 19 October 2010

SoftFlex steampunk beading contest -- time to vote!

I got an e-mail yesterday, saying the voting for the entries in the steampunk themed beading contest by SoftFlex is now live. Check it out here. I've got one entry there so any vote for me is greatly appreciated.

As they only show one photo of each entry, I thought I'd publish a few detail shots of my necklace here. I couldn't think of a good name for it so please don't shoot me for the one I came up with... It's just very desciptive: I wanted to make something that'd look like some sort of mechanism. The gears don't actually do something, but I wanted it to at least have the illusion of a working mechanism. While I can enjoy designs that just scatter cogs and gears around -- as explained here -- I thought it too "cliché" for a steampunk design.

I added an extra "antique steel coloured" faux watch movement to the back, which is barely visible under the larger antique brass coloured one. This not only added weight but also depth and enhanced the illusion of a plausible mechanism. It would by now means fool anyone that know how a mechanism works -- or anyone that's ever seen a working mechanism (i.e. everybody), but still... My mom don't understand why I did all this on the back of the pendant -- the part nobody will see when you wear it. But without these parts, there'd be no illusion, no matter how easy to unveil.

My second wish was to combine two lovely metals: tarnished brass and black iron. Not real castiron, but close enough. I like the mix of black and brass or sepia (as in this online game). As usual I went for a rather simple design, perhaps unconciously inspired by the clean art deco lines you see in Little Wheel, the game I linked to.

As you can see, the pendant is really what I focused most on in this design. I used faux gears (Tim Holtz and brass stampings), a found brass circle "thingy", brass "bezel lace", and Vintaj decorivets (in Arte Metal). Several parts I bought using my gift certificate from Rings & Things so in a way they're the ones that made this design come true. The decorivets I got from another fab American bead shop, Bello Modo.

I riveted (= no glue here!) the pieces together using a brass rivet that is placed slightly eccentric in the centre of the compass rose. It was a "drilling accident" but I had but one compass component so I had to live with it. I kind of look at it as if it's supposed to look like a black cresent moon (or partial solar eclipse I guess).

Anyway, I hope you like it and likewise, I hope there at least a few people out there who like it enough to vote for it. I don't have high hopes, seeing all the beautiful and complex entries that I compete with, but I enjoy the challenge of participating in contests.

Thursday, 24 June 2010

The things I buy...


Do you know what that is in the pic above? It's a dozen bolo slides -- a finding normally used when making bolo/bola ties (a country/western thing). I'm not planning on making anthing along those lines. This was a thing that just had to find it's way to my wishlist after reading the post Make your own big bracelet blanks by Dave over at the Rings & Things blog. The background for the post was that one of the R&T employees had a smart idea for how to make a bigger bracelet blank, as requested by a costumer. She found the bolo slides to be ideal for the purpose.

And of cause that sort of idea triggers my creativity. I began thinking about what other ways you could use this slightly unusual -- if you're not into the whole country & western thing -- finding. I got one idea just while reading the post and when I received the slides -- of cause I had to buy them in the end -- I had a new idea.

So, I know how to use the first two slides. That leaves ten more to come up with ideas for. I did hesitate to buy a package as I felt I didn't have enough ideas for a whole dozen, but I do think I'll get around to using them all. Good thing is they weren't too expensive either so can experiment freely without feeling like I'm wasting money.


I've been on a spending spree lately, I feel, and so the bolo slides weren't the only thing I bought just to try them out.


This is a new typ on "clip-on" earrings for me. I'm always trying different versions -- from screws to cuffs -- in search for less painful fake earrings than the horrible clip-ons I found as a kid. This version is very simple and with the right typ of wire (I'm thinking springy steel) you could probably do these yourself. Also they weren't too expensive, something that is often the problem with clip-ons as they have all sorts of springs and hinges to keep the earring on the earlobe.

I've already got a favourite type of clip-ons that are similar to these, but with a spring thingy, which makes them more expensive. Below is an example of what I've made with that type.


And, oh, I got some bezel lace too. Isn't it pretty?


Had only seen it in sterling before, which is beyond my budget, so I was thrilled to find it in my latest favourite metal, brass. Bezel lace is used for setting stones and the smart thing is that the loops make this type of gallery wire useful for wireworkers that doesn't solder as well. The top bezel is so pretty on its own I'll probably use it as a decorative trimming on a pendant or something too.

Friday, 28 May 2010

Lucky Fridays? Island Flower necklace


So, last Friday I got an e-mail saying I'd won a candy giveaway. 1 kg (6 bags) of Gott & Blandat Sötsur, which I got yesterday. Today I opened my mail in the afternoon to find an e-card fron Rings & Things saying my Island Flowers necklace above was on of Polly's Picks in their Your Designs Rock Contest. That is, not an official prize winner, but I still get a (much appreciated) $50 gift certificate.

Polly's Picks are defined as "designs our editor especially likes despite the fact that they did not win a formal prize. These designs are often simple, practical and/or whimsical examples of how to use Rings & Things components well." This is the second time one of my entries have received this honour. In 2007, the first year I made something for this contest, my Oak Island jewellery set was picked.

This is a slightly different piece of jewellery compared to what I usually make. Flowers is nothing unusual, but the size and chosen material is. Also, to work with the larger focal piece, the necklace is somewhat longer than the princess lenght I mostly seem to prefer. Instead of taking inspiration from nature in my surroundings, this was a necklace that had me thinking of tropical islands with white shells in the sand by the beaches and brown coconuts in palm trees.

I made the flowers from shiny cowrie/cowry shells with the backs cut off, which made them easy to weave together using 20 G vintage bronze wire (coloured copper). I got the inspiration partially from those shell motifs with embroidery floss and an occasional bead that you can buy for embellishing clothing and bags, but instead of gluing the shells to a backing material, I chose wirework. Three flowers are wrapped together to make a larger focal piece (approx. 13cm measured from side to side). The focal piece is suspended using dark brown cotton cord that has been folded in half and slightly twisted to hold the two cords together (held in place by 'messy-style' wire wraps). To it has been added two pairs of 'leaves,' also wrapped with the same wire.

The necklace started out consisting of just one flower, but I felt I wanted to make something larger. (Not just because it was for an American contest.) So it became three flowers. The leaves might be a bit redundant, but I wanted to make something with a bit more embellishments than the usual 'Scandinavian minimalism' I so often lean towards in my designs.

The difficult part of this necklace was finding a matching clasp. I figured it best to make my own using the 20 G wire. But why make an ordinary hook-and-eye closure?, I thought, seeing a pair of small cowrie shells with large openings. So I attached the hook to one shell and used the other shell instead of an eye loop.


Your can find my necklace here in the R&T gallery where you also find all the winners and other Polly's Picks.

Monday, 22 February 2010

Cute cat beads


I sort of collect cat beads (along with dragon and bat beads). I love cats so of cause I began buying cat-related beads and jewellery findings when I became a beader. Later I realised I rarely used my cat and dragon beads. They were too pretty. So now, instead of a bead stash I call it a collection.

The sweetie above is a tiny Peruvian ceramic cat bead from a mix -- or litter if you prefer that -- of fun cats in all sorts of colours. Yet another thing I bought with the money I won over at the R&T blog (which I've already mentioned).

Below is a Chinese porcelain cat I got from an eBay seller. The thing with these porcelain cats and especially the lucky cats/maneki nekos is that there always seems to be a diffent one: new posture, new colour, new patterns etc. I can never get one of each type of cat bead made. Every seller is bound to have a version slighly different from all the ones I already have. Which makes me want to buy that one as well...

Saturday, 19 December 2009

Lovely purples: Alchemy and montana burgundy luster


Ok, this isn't the fist time I talk about these beads, but I just love the colours. So bare with me just one more time.

The rivoli is from Preciosa and the lovely Alchemy is one of their H.Y.T. Colors. It has gorgeous brownish and heather purples. Rather difficult to describe, but oh so lovely. Preciosa themselves says about Alchemy:
The colour of ancient copper -- at first glance unremarkable yet at second glance enthralling. What is its true colour? Brown or purple? Red or pink. Simply captivating.
The quote comes from their website hytcolors.com -- don't miss all the other H.Y.T. Colors that are presented on the site: Lilac smoke, Graphite, Plum, Dark Orchid, Night Helio, Dream, Lava Flow, Brown Sugar, Light Gold, Caramel, Pinky Peach, Red Fuchsia, Beach Topaz, and Steel.

The fire-polished beads next to the rivoli are in a hue called montana burgundy luster. Stictly speaking it's not a purple colour, it just looks that way. The glass is montana blue and then coated with a burgundy luster. In fact, when holding the beads up against light you can see the blue shine through the coating. But most of the time you see the blues mixed with the dark reddish surface finish. And we all know that blue and red make purple. In this case a lovely dark purple, leaning towards burgundy.

These beads are probably my favourite buy this year, another thing I bought with the gift certificate I won on the R&T blog. And at R&T there's actually a small photo of the beads where you can see how the beads look,being held up in front of a light source. If you think it's hard to see the variation in my pic.

Two different purples, one a warm almost brownish nuance and the other a cooler more metallic look, but both equally gorgeous!

Wednesday, 16 December 2009

Working on a copper pendant.


When writing about my Vintaj blanks, I said I was a lucky girl for winning no less than three giveaways. Well, part of my luck was also winning a 50 $ gift certificate at the Rings & Things blog. One of the things I bought was a 24x19 mm copper blank (tablet shape). Didn't know what I wanted to use it for -- except that I was going to combine it with another copper blank, a 24x6 mm elongated oval with two holes, that I'd already bought from another shop.

Using a pair of round-nose pliers I bent the oval in half so it turned into a bail. In the photo I've only temporarily attached the bail on the pendant using a headpin. Because this is as far as I've come. Not sure yet what I want to do with the pendant, how I want to embellish or decorate it. Before that I don't want to attach a bail that could make it awkward to work with the pendant.

I wanted to show it already as a tip on how you can combine metal blanks -- and how you can make matching bails for your copper pendants.
Related Posts Plugin for WordPress, Blogger...