Sunday 30 June 2013

The seaside pendant -- an acrylic doodle


It's ages ago since I participated in a monthly challenge it feels like. This month I really wanted to get started on something and gathered info on challenges. One challenge that I instantly felt a connection to was the Art Bead Scene Blog challenge, featuring a painting by Franklin Carmichael called Jackknife Village. Living on a peninsula, always close to the sea, I really liked the landscape he conjured up on his canvas. While it doesn't really look like that around here, the image reminded me of the childhood vacations I spent in Bohuslän (google it and you'll get photos illustrating my point). It's pretty similar to the Bohus coastline. In other words, it was an image that wouldn't leave me.

Some weeks ago I felt compelled to paint a pendant with these images -- of the artwork and the childhood vacations -- in mind. I got out a 34 mm arte metal (i.e. blackened steel) pendant and started painting using white gesso that I tinted with acrylic paint. Now, the only small brushes I have are watercolour brushes as that's always been my favourite media when it comes to painting (ironically, Carmichaels painting is watercolour and I still didn't choose that myself for this project). No way I was going to ruin them with acrylic paint -- and besides, the brushes are made for heavy paints like oil and acrylics anyway. So I had to make due with some bigger craft quality brushes instead, which partially determined what style to paint in: it wasn't possible to paint any fine details so instead I opted for an impressionist style. The kind that just look like smudges of paint close up, but forms a dreamy landscape when you take a step or more back and admire it from some distance. I always did like impressionism as a teen.

It's really just a doodle, but a doodle I had a lot of fun working with. It might not be perfect, but I'm still pleased with it. While it might be hard to understand from seeing these photos, I must say it looks quite pretty in real life -- though of cause I see it through my own rose-tinted glasses right now.


So the challenge really inspired me, but unfortunately I also wanted to participate in it for real (and get a chance to win as they always have such lovely art bead prizes) and the pendant just didn't want to turn into a piece of finished jewellery (a bead strung on cord or chain doesn't qualify). So frustrating! The days went passed and I couldn't find anything useful in my stash. No blues or if I found any they were the wrong blues (pendant have a slightly lavender blue, most my blues are turquoise). Or the wrong finish: the pendant is so matte that any shiny bead detracts from the focal. The last day today and anything I did try failed. Everything conspired against me!

Wanting to at least do something with the pendant, I made this necklace which I doubt will be approved by the ABS team. But at least I did finish a project so I should feel good about myself anyway, even if I can't officially be part of the challenge this month.


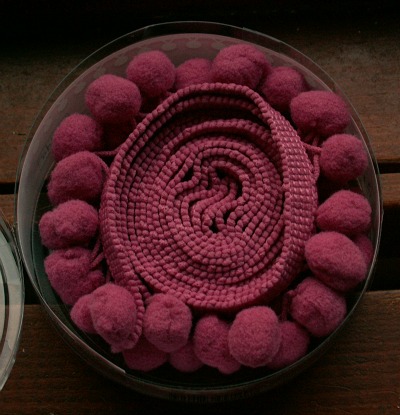
The cord, by the way, is one that I've tea dyed myself. Tea dyeing might not be the best method of dyeing textiles as the tannins can weaken the fibres over the years, but it's easy and fun -- and you can experiment to get just the right hue. Like in this case: I let some cords steep longer than others which gave me range of hues to choose from when wanting to find a good match for the pendant. It looks a bit dark in the first two pics, but it really does match the cliffs in the pendant.

The necklace cord is simply made by doubling the cord, knotting a loop in one end and tying the loose ends to a metal button. Nice and simple. You just need a cord long enough, which was really just barely the case here.

Saturday 29 June 2013

Maneki's bead blog recap weeks 24-25


Medieval silver beads and jewellery (1100-1500 AD)
[Photo: Statens historiska museer/Gunnel Jansson, cc by-nc-nd 2.5 se]


It's over a week ago since the last blog post before the blog vacation was posted, but it wasn't until now I got a little time to sit down and do the last recap for this season. This time you can find everything from contest tips and beaded flowers (bouquets and boutonnieres) to historical bead charms and jewellery to turkish beaded lace.

All this and more after the break!

Friday 28 June 2013

Instead of Meowy Monday -- a friday cat story


No cat pics of the week this week as I was otherwise engaged. However I just have to tell you what I just saw -- and unfortunately didn't manage to capture on camera.

The cats like to climb up the telephone pole. I've mentioned that before and you can see pics of it here, here and here. Some of them climb halfway up, other might even reach the top before climbing back down. But very rarely do they do what I just saw Ubbi (aka Uggi aka Ullegull -- Ubbi is my latest nickname for him) do: I was just looking out the window, taking a break from being on the computer, and spot something on top of the pole, which is more or less at my eye level here on the upper floor. That something turned out to be Ubbi! Sitting on a pole that's barely wide enough for a cat to sit on!

Don't ask me how he got down: I went to go get the camera and he probably thought I went to feed them so he came down real fast while I grabbed the camera and at the same time told my sis what was going on. So he managed to get himself down unhurt. What a adventurous, fearless -- crazy -- cat he's turning into, our little Ubbi...


Tuesday 25 June 2013

June bead soup palette


While I'm blogging anyway, I might as well also put up the june bead soup I made for my other blog. Once again a simple mix, this time in sort summer colours: lavender blue (white opal tends to get a blue or purple tint when some finishes, such as apollo gold, are applied), pink, purple and matte metallic.


Midsummer nights


My idea was to be up and take photos during the midsummer night (i.e. night between Midsummer's eve and Midsummer's day), but it rained. A lot. And then the sky was heavy with dark clouds obscuring the twilight. Below is a pic taken from the evening between two rain showers. Pretty, but not much light at all. It didn't feel like a good choice of a wakeful night.


However, as I found it hard to sleep last night I was up then instead. First I took a few pics around midnight, then I read The Whisperers for a few hours (the tome has over 700 pages so it's taking me a while to read) before, in vain, trying to sleep. So I got up around 03:30 in the morning and then again half an hour later when there were more light. Was too tired to stay up longer and see the actual sunrise, which I checked was round 04:20, so just photos of dawn, not a sunrise. I rarely get photos of sunrises for two reasons: I'm not a morning person and the view to the east is obscured by trees. It can happen i june because I stay up a few extra hours: being used to going to bed after midnight it's not too hard to wait for the light to return.

These are some of the pics I took last night when staying up, waiting for dawn. Please excuse the quality: I didn't have a tripod so some pics are a bit blurry and others are noisy due to the minimal light. If not otherwise noted all photos are facing north (exception being photos of the rapeseed field, which is to the west/southwest).


22:50 (barely one hour after the sun set)


Midnight


03:30


Looking back at the moon over our garden. The pic above is taken facing northwest, looking for the sun.


04:00


Because of the weather this wasn't the best summer night to stay up, the rain clouds and cold "ruined" it, but otherwise there's something magical about experiencing a night in june outdoors. Watching dusk turn into dawn, listening to the birds sing and the cows and horses graze, hearing the hum from the neighbour's stables, feeling the lukewarm night air and the dewy grass, seeing all the white flowers floating in the darkness of the foliage. It's just beautiful. So peaceful. So joyous.

It's a pleasure any summer night, but when the weather is warm and the sky cloud free it's something special. Truly magical. I'm keeping my fingers crossed there's be such a night this year -- before the nights get too dark and too long again.

Friday 21 June 2013

Happy Midsummer's Eve!


It's midsummer's eve here in Sweden today. Quite decent weather too: windy, but pretty warm and it isn't raining. Yet. So I just wanting to take the time to wish everyone a great midsummer weekend with some random flower photos. Enjoy!


 Both the cultivated and the wild flowers are in full bloom.


Some of the free one spreading beyond where they were planted last year (the ceramic  troughs on the right). Pansies want to travel and see the world too!


More summer pics? How about the sea in sunshine from earlier this week?


And to end this post, going from day to night:

You can tell midsummer's been coming for some while. I took the photo below at midnight, facing north, a couple of days ago. Not using a tripod.


With that I wish you all a magical midsummer's night!

Thursday 20 June 2013

Solder and tin paste experiments


So step one was to clear space at the worktable. Last night and today I got some time to play a little at that very table. Got to make use of the workspace now that I have it, right? Keeping it simple, I just picked up a few things to dabble with: little copper pendants, solder, flux and tin paste. Things that require that special workspace as it meant lighting that micro torch for the first time in ages.

Now, I should say that I've never soldered anything (if you don't count that copper spiral I added some solder to just to test if I'd be able to do some sort of solder joint). Have pretty much just melted solder from time to time, wondering when I'd make a project requiring this particular skill. And I don't have any good instructions for using tin paste so it was basically about playing around and see what happens. Of cause using due precautions as I'm using stuff that comes with warning labels.


These were my first two experiments. On the one of the left I used some plumber's silver solder I got from my dad. Don't really use it much since it didn't say what's in it and I do prefer to know that. It took time to melt, that much I know at least -- which is why I accidentally created the big dollops of unmelted solder. Drops that turned out to add a nice texture so it was a pretty good mishap.

The one on the right is tin solder (tin/copper/silver). The idea was to try this technique -- also see this link -- but I don't have the right stamps (clear stamps is a bad idea, don't ask me why I say that!). So instead I just melted solder and then hammered it a bit. All copper pendants are heated and hammered prior to solder application, by the way.

Both pendants were then oxidized using a tiny bottle of stink -- AKA liver of sulphur -- that I've had for ages, but actually use sometimes. Just a few drops are needed so the little bottle last a long time.


Then of cause I had to test my tinning paste (99,9 % tin). In theory I know how to use it, but I've never read any clear, detailed instructions. I didn't want to just tin the surface, but create a water drop effect described by Fleur Grenier in her book Pewter: Designs and Techniques. Unfortunately her instructions are really scarce, the only time she mentions tin paste and it's when describing how she made a project of hers, not one of the step-by-step projects in the book. It pretty much assumes you know your way around tin paste weirdly enough for a beginner's level book, which it is. Anyway, these were my first two tries at the water droplet tinning techniques. Far, far from perfect (I want the copper surface to show through between drops as in the book), but at least it's droplets. Not bull's-eye, but at least somewhere on the target.

The right one is oxidized.


Then just a few hours ago, I made these two samples. Same as above, just less paste and more dotted onto the surface than above. Both pieces where then oxidized soot black.

A fun time playing, even if not all samples are what I was striving for. But, hey, I am a newbie at solder and tin paste so what else is to be expected? I need to learn and practice -- and, besides, some of the pieces are cool and I do really like them. Below are my top 3.


Those results are really worth working more with, see where it will take me and what potentials there are in the techniques. Just need to polish my technique and read up on some basics while I'm at it.

What do you think?


~*~


Just a little footnote, which is pretty OT: Have you seen that I've added a new pinboard on my Pinterest page? It's called Colour it! and is all about painting, dyeing, drawing and in other ways adding colour to materials such as fabric, paper, metal, wood, glass etc. Not including patina, faux finishes and crackle as there's already a board for that. (It's amazing how fast you get up to over fifty boards -- Colour it! is board no. 63. I'm conservative when it comes to adding more boards and now there's over sixty anyway.)

Tuesday 18 June 2013

Something I bought


I mentioned in the comments that my sis and I were temped by the Panduro sale and bought a few things that I hoped would perhaps also spark my creativity a bit. Won't show all the things we picked up (but can mention a gaffe: the computer had hiccups and we missed that we added two 500 ml black gesso jars instead of one -- so stupid: it doubled the price and we don't use enough gesso to get through one jar in years!). But am showing you this as I thought it was a fun thing to mention.

Can you see what it is? If you've bought it yourself, you probably do. Otherwise you might get a hint from seeing the "underside":


Yes, it's pom-pom fringe! An why have I bought it since I'd never trim anything with pom-pom -- not just because the cats wouldn't be able to keep their paws from it. I bought inspired by this. She makes flowers of the fringe, but I was more thinking of it in terms of interesting embroidery texture (cf. these shibori techniques). Perhaps add it in an embroidery. Perhaps add beads to idea. Don't know. I just knew it was something I had to try.

In the local Panduro shop, they only had this trim in black and white and there aren't many other haberdasheries or fabric stores around here. Maybe the white could've been dyed or painted (no expert on how well various fibres accept colour), but it kept me from buying any. Until this sale, which included purple pom-poms. Half the price and a pretty colour -- perfect!


(And, yes, the shibori version is way more elegant and exciting, but I've got much to learn before being able to do that myself and using pom-pom fringe is a fun and easy technique I can do right now. )

Monday 17 June 2013

Meowy Monday: Cat photos of the week


Jisse has found a new best place. Several of the cats -- including Uggi! -- like to sit on top of our open windows, both downstairs and upstairs, and while we didn't like it in the beginning -- and not a bit when kitten Uggi followed suit! Upstairs! -- we've come to accept that they like and they don't fall down. Right now it's Jisse who have claimed my sister's bedroom window as his favourite place. Either he sleeps in the window or he sits on top of it.


 Don't know how high it looks. It's not extremely high -- some of the cats like to jump out through that window -- but high enough for us to prefer that they don't. Over 2 metres in any case. Plus the height of the window in the case of Jisse's lookout.


 Not sure if he's looking at one of the birds that have a nest under the roof or one of his enemies on the ground.


 Seen from below and then, finally, seen from inside the room:


The perfect place for some grooming. A cat's gotta look pretty!

Look, a free workspace!


Nowadays I mostly work with needle and thread, which can be done in the comfort of a bed or sofa or pretty much anywhere it's cozy and relatively cat free. That means I don't need a designated workplace like when working with e.g. metal, but I still do like to work with metal sometimes. It's a nice contrast, moving from embroidery floss and tiny beads to metal and other techniques that demand the use of tools in a way working with needle and thread doesn't.

So a workspace is important and I have to luxury to have one, or even two, in a room just for creating. For a long time, my sis had filled it with stuff she didn't have time to organize so it was hard even to try to get through the door. Nagging didn't work and I sure as hell wasn't going to clean up her mess. Well, now she has tidied up which means I can access my workspace without being frustrated by all the crap she filled the floor with. Which also meant I could see my workspace and the state it was in and had been in for more than half a year.

There's a fine line between creative chaos and clutter. Creative chaos is great: it means surrounding yourself with and emerging yourself in all your lovely supplies. Inspiring colours, shapes, textures and perhaps even scents. It's not supertidy, but it's more or less organized though it might not look like it for an outsider. It can also make you feel productive as it shows that things are happening here. But it can grow into the complete opposite. It can become clutter and clutter removes energy where the creative chaos can infuse you with it. Clutter hide things instead of letting you see them, even if they still are right in front of you. And the longer you let clutter grow, the worse it get as it is easy to abandon the workspace or find it hopeless to even start to untangle the mess.

So while I don't think clutter is the reason I've felt uncreative for a long time, it does add to the situation and this weekend I felt ready to do something about it. A long work day on Saturday gave me a boost of energy (yes, I do believe in the positive effects of exercise an manual labour, letting the body work invigorates both body and brain so not being very physically active, a day of farm labour can recharge my batteries even if it makes me physically tired). And on Sunday I managed to tidy up quite a bit, which also included sorting beads -- a great way to be inspired by colours and rediscovering beads you've forgot you had or put aside for projects that never were realised.

No before photos, but I can tell it looked worse than in these photos (the second set -- the first one's from when the room was new). That's more before crossing the clutter line. Just before, but still not too bad. No, nothing like it's been lately with more or less no free space at all, which is particularly bad if you want to solder or do any kind of metalwork. Either you end up setting something on fire or all the lightweight stuff you put away on the table bounces off it as you try to texture some pendants. So this is a huge improvement. Still need to put away the paint tubes and jars and sort a few things -- and thing of a better way to organize my tools or at least get a bigger box for them there on the table -- but there's open table space now. Places to work. I don't remember the table being that big! So much space!

Also tidied up the beading table (which once had nothing more than a tablecloth and fruit bowl on it so it could be used for boardgames, eating at and just generally invite friends to join). For some reason my half of the table has gotten smaller while my sis' side has enlarged... Not going to fight over it, though. At least not until I need that extra decimetre. That's her organized mess you can see beyond my paper plate, black box filled with pearls and the beading wire tower.


I didn't choose those vinyl tablecloths -- but free is not to frown upon.


Now the only thing remaining is getting more bead storage so I can't empty that cardboard box I call a bead box (sadly my chosen bead storing system is really expensive, but now that I began using it I want to keep it uniform) and finally decide to destash the culled beads. Some are nice enough to swap or give to someone, others are either very basic or a tad boring to gift someone with. Unsure about whether to sell the former or keep it for swaps and bead soup parties. It's useful to have a "swap stash" when you can't always buy new things, but it could also equal money to buy beads I want more.

But that's for another day. Now there's space to breathe and work and that should be enjoyed now instead of filling the head with new things to feel guilty about not having done. You must have time to enjoy the things you do, not just see the things still not done because there'll always be things to do, things you keep feeling you ought to do and feel bad about not having done yet.


And, no, I haven't forgot it's a meowy monday today. Coming soon!

~*~

Update: I reorganized the tools too. That part did look kind of messy in the first pic. I found a tray to put some of them in and just kept the hammers in the original "tool box". Also took out the knives and scissors from a box and added them to the tray. And tidied up the plier holder (which I also use for scissors etc).

Plus I removed jewellery from half of the shelves on the left side wall and filled them with paints, media, inks and glues instead so I now have them closer to me -- and I can see them all: I'd forgotten a few of those paint bottles...


Uhm, the paint is from when I painted the seaside pendant. As it's just acrylics, which are easy to remove, I haven't bothered to clean it up yet. Will do it next time I need the workspace instead. The pieces of blue tape are left from one time when I needed to measure something I think. Also something I haven't bothered to remove as they're A) easy to get off at any time and B) they don't bother me -- not until I show a pic of the worktable for everyone to see...
Related Posts Plugin for WordPress, Blogger...